Cuisinart Automatic Bread Maker Instructions: A Comprehensive Guide
Congratulations on acquiring your new Cuisinart Bread Maker! This guide provides detailed instructions for optimal use, ensuring delicious, homemade bread with ease and confidence.
Welcome! Your new Cuisinart Automatic Bread Maker opens a world of freshly baked goodness, offering convenience and consistent results. This appliance is designed for simplicity, allowing you to enjoy homemade bread, doughs, and even sweet treats with minimal effort.
Before your first bake, carefully review this manual to understand the machine’s features and operating instructions. Cuisinart has a 30+ year history of quality kitchen equipment, and this bread maker continues that tradition. Remember to read all safety precautions and product labels before use. Familiarize yourself with the control panel and the various program options available.
This guide will walk you through each step, from unboxing and setup to baking your first loaf and beyond.
Unboxing and Initial Setup
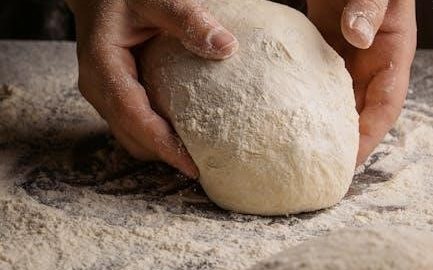
Carefully unpack your Cuisinart Bread Maker and verify all components are present. You should find the bread maker unit itself, the bread pan, a kneading paddle, and this instruction manual, potentially including a recipe booklet. Inspect all parts for any shipping damage.
Before the first use, wipe the exterior of the machine with a damp cloth. Wash the bread pan and kneading paddle with warm, soapy water, then dry thoroughly. It’s recommended to run a practice cycle – select the Basic Bread program without any ingredients – to burn off any manufacturing residue. This ensures a clean and odor-free baking experience.
Place the bread maker on a stable, level surface, away from water sources.
Safety Precautions
Read all instructions carefully before operating your Cuisinart Bread Maker. Avoid touching hot surfaces; always use the plastic base or handles for carrying. Never immerse the unit, cord, or plug in water. Close supervision is necessary when the appliance is used near children.
Do not operate the appliance with a damaged cord or plug. Unplug from the outlet when not in use and before cleaning. Allow the unit to cool completely before cleaning or storing. Avoid using accessory attachments not recommended by Cuisinart. Ensure proper ventilation during operation and never block air vents.
Press the START/STOP button for three seconds to halt the machine immediately.
Understanding the Control Panel
The control panel allows you to customize your baking experience, selecting loaf size, crust color, and various pre-programmed settings for diverse bread types.
Loaf Size Selection
Selecting the appropriate loaf size is crucial for achieving perfectly baked bread. Your Cuisinart Bread Maker offers options for 1-pound, 1.5-pound, and 2-pound loaves, catering to different household sizes and appetites.
Press the “Loaf Size” button repeatedly to cycle through the available options until your desired size illuminates on the control panel. Remember to adjust ingredient quantities accordingly when changing loaf sizes; the recipe booklet provides guidance. Using the correct loaf size ensures even cooking and prevents overflow during the baking process. A smaller loaf will bake faster, while a larger loaf requires a longer baking time.
Crust Color Control
Customize your bread’s crust to your preference with the Crust Color Control feature. Your Cuisinart Bread Maker offers three settings: Light, Medium, and Dark. Press the “Crust Color” button to cycle through these options until your desired shade is displayed on the control panel.
A lighter crust results in a softer texture, while a darker crust provides a more robust flavor and crispier exterior. Experiment to find your ideal setting! Keep in mind that higher altitudes or humidity levels may affect crust color, potentially requiring adjustments. Consistent ingredient measurements also contribute to predictable crust results.
Program Selection Overview
Your Cuisinart Bread Maker boasts versatile pre-programmed settings for various bread types. Press the “Prog” button to navigate through the available programs. These include Basic, Whole Wheat, French, Sweet, and Dough. Each program is optimized for specific ingredient ratios and kneading/rising times.
The Basic program is ideal for standard white bread recipes. Whole Wheat utilizes longer kneading for gluten development. French Bread creates a crispier crust. Sweet Bread accommodates higher sugar content. The Dough program allows for manual shaping and baking. Refer to the recipe booklet for program-specific ingredient guidelines.
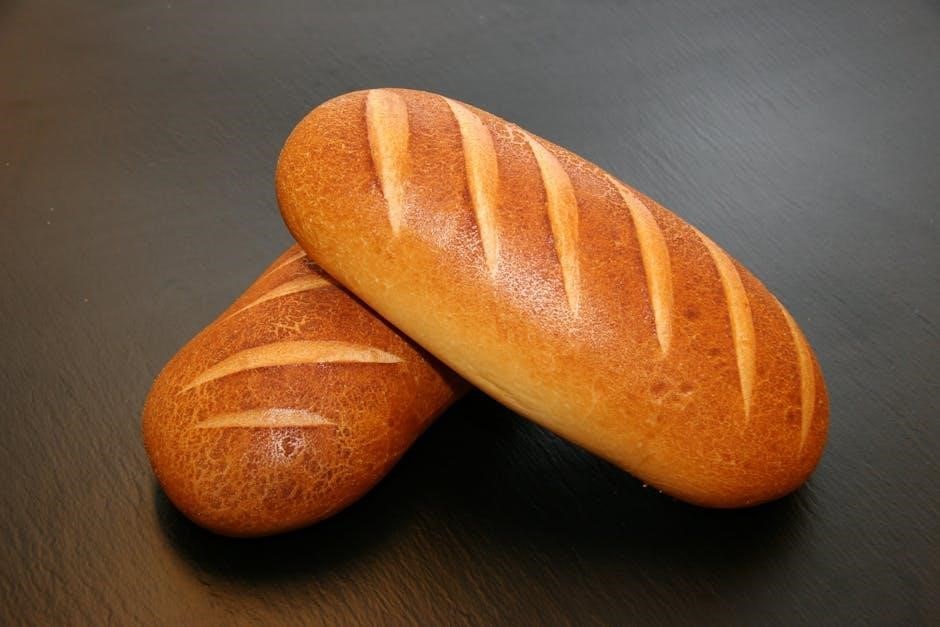
Basic Bread Program
The Basic Bread program is your go-to setting for everyday loaves. It’s designed for traditional white bread recipes, offering a reliable and consistent bake. This program typically includes a kneading cycle, several rise cycles, and a baking cycle, all automated for convenience.
Ensure ingredients are added in the correct order – liquids first, then dry ingredients, with yeast last. This program is ideal for beginners, providing a simple and straightforward baking experience. Adjust loaf size and crust color to your preference before starting. Expect a baking time of approximately 3 hours and 30 minutes.
Whole Wheat Program
The Whole Wheat program is specifically calibrated for recipes containing a significant amount of whole wheat flour. This program features a longer kneading and rising time to accommodate the denser nature of whole wheat, ensuring a lighter, more airy loaf. It’s crucial to use bread flour with a higher protein content for best results.
Whole wheat flour absorbs more liquid, so you may need to slightly adjust the recipe. Select your desired loaf size and crust color before initiating the cycle. Expect a total baking time around 3 hours and 55 minutes. This program delivers a nutritious and flavorful whole wheat bread.
French Bread Program
The French Bread program is designed to create loaves with a crisp crust and a chewy interior, characteristic of traditional French bread. This program utilizes a specific kneading pattern and temperature profile to develop the gluten structure necessary for that authentic texture. It’s best suited for recipes with a higher hydration level.
Select the French Bread program, your preferred loaf size, and crust color. The cycle duration is approximately 3 hours and 30 minutes. For optimal results, use bread flour and consider adding a small amount of malt powder to enhance crust color and flavor. Enjoy a taste of France, baked fresh in your kitchen!
Sweet Bread Program
The Sweet Bread program is perfect for creating enriched doughs like brioche, challah, or cinnamon swirl bread. This program incorporates a slower kneading process and a warmer proofing temperature, ideal for yeast activation with higher sugar and fat content. It ensures a soft, tender crumb and a beautifully golden crust.
To use the program, select “Sweet” on the control panel, choose your desired loaf size and crust color, and press start. Recipes often include ingredients like eggs, milk, butter, and sugar. Be mindful of ingredient order, adding liquids first. Enjoy delightful, homemade sweet treats!
Dough Only Program
The Dough Only program is designed for recipes requiring dough to be baked in a conventional oven or shaped into rolls, pizza, or other creations. This cycle completes the kneading and first rise, leaving you with perfectly proofed dough ready for further processing. It bypasses the baking stage within the bread maker itself.
To utilize this function, simply select “Dough” on the control panel, choose your loaf size, and press start. After the cycle finishes, carefully remove the dough from the bread pan. This program offers flexibility, allowing you to customize the final baking process to your preferences.
Preparing to Bake: Ingredients and Measurements
Success relies on quality ingredients and precise measurements! Accurate proportions are crucial for proper dough development and a consistently delicious loaf every time.
Importance of Ingredient Quality
Using high-quality ingredients significantly impacts the final product. Fresh yeast is paramount for proper rising; expired yeast yields a dense loaf. Flour type matters – bread flour, with its higher protein content, develops stronger gluten, resulting in a chewier texture.
Avoid using overly processed or stale ingredients. Water temperature is also critical; lukewarm water activates the yeast effectively. The quality of fats, like butter or oil, contributes to flavor and texture. Even small details, such as using pure extracts instead of artificial flavorings, elevate the bread’s overall taste.
Investing in good ingredients translates to a superior homemade bread experience, maximizing the potential of your Cuisinart Bread Maker.
Accurate Measurement Techniques
Precision is key when baking bread with your Cuisinart Bread Maker; Always use dry measuring cups for flour, sugar, and other dry ingredients, leveling off with a straight edge. Liquid ingredients should be measured in liquid measuring cups at eye level for accuracy.
Weighing ingredients, particularly flour, is the most accurate method, offering consistent results. Avoid packing flour into the measuring cup, as this adds excess volume. Following the recipe’s measurements precisely ensures the correct dough consistency and optimal bread texture.
Inaccurate measurements can lead to bread that doesn’t rise properly or has an undesirable texture.
Adding Ingredients in the Correct Order
Following the correct ingredient order is crucial for successful bread making with your Cuisinart machine. Typically, begin with liquids – water, milk, or oil – directly into the bread pan. Next, add dry ingredients like flour, sugar, and salt.
Create a well in the dry ingredients and add the yeast last, ensuring it doesn’t come into direct contact with the liquids initially. This prevents premature activation. Finally, add any optional ingredients like seeds or nuts.
This order ensures proper mixing and activation of the yeast, leading to a well-developed dough and a perfectly baked loaf.

Baking Process: Step-by-Step Instructions
Securely place the bread pan, attach the kneading paddle, select your desired program, and press start to begin the automated baking cycle effortlessly!
Securing the Bread Pan
Properly securing the bread pan is crucial for a successful baking cycle. Begin by ensuring the kneading paddle is firmly attached to the shaft within the pan. Gently slide the bread pan into the bread maker, aligning the handle with the designated slot.
A distinct click will confirm it’s correctly positioned. Always verify this secure fit before initiating the baking process; an improperly seated pan can halt operation or lead to uneven baking. The machine won’t start if the pan isn’t locked in place.
Double-check that the pan moves smoothly but is firmly held, preventing any wobbling during kneading and baking. This simple step ensures consistent results and prevents potential issues during operation.
Kneading Paddle Attachment
Attaching the kneading paddle correctly is essential for proper dough development. Before adding ingredients, carefully remove the paddle from its storage location. Align the paddle’s shaft with the drive socket inside the bread pan.
Gently push the paddle onto the socket until it clicks securely into place. Ensure it’s firmly attached; a loose paddle won’t effectively knead the dough. The paddle is designed to detach from the loaf after baking, so don’t worry about removing it beforehand.
Inspect the paddle periodically during the kneading cycle (through the viewing window, if available) to confirm it remains securely connected. A properly attached paddle guarantees a well-kneaded, evenly textured loaf.
Starting the Baking Cycle
Once all ingredients are added in the correct order and the bread pan is securely placed inside the Cuisinart Bread Maker, you’re ready to begin the baking cycle. Press the ‘Start/Stop’ button to initiate the chosen program. The machine will automatically proceed through kneading, rising, and baking phases.
The control panel will display the current stage of the cycle. Avoid opening the lid during baking, as this can affect the oven temperature and potentially impact the bread’s rise.
You can briefly check the dough’s consistency through the viewing window, if your model has one. Pressing the ‘Start/Stop’ button again will pause or cancel the cycle.
Monitoring the Baking Process
While the Cuisinart Bread Maker is designed for automated baking, periodic monitoring is still recommended. Observe the process through the viewing window, if available, to ensure proper kneading and rising. Listen for any unusual noises, though some machine operation sounds are normal.

Avoid frequently opening the lid during baking, as this releases heat and can affect the bread’s texture. A quick peek towards the end of the baking cycle to check the crust color is acceptable.
Trust the programmed settings, but be prepared to adjust baking time slightly if needed, based on your observations.
Troubleshooting Common Issues
Encountering problems? This section addresses frequent concerns like bread not rising, dense loaves, burning smells, or a stuck kneading paddle – ensuring baking success!
Bread Not Rising
Insufficient yeast is the most common culprit when your bread fails to rise adequately. Ensure your yeast is fresh and hasn’t expired; old yeast loses potency. Accurate measurement is crucial – too little yeast won’t activate properly.
Incorrect liquid temperature can also hinder yeast activity. Liquids should be lukewarm (around 105-115°F / 40-46°C) to activate the yeast without killing it. Check the water temperature with a thermometer.
Too much salt can inhibit yeast growth, while insufficient sugar deprives it of food. Verify ingredient amounts and follow the recipe precisely. Finally, ensure the machine’s lid is securely closed during the rising cycle.
Bread Too Dense
Dense bread often results from using too much flour or not enough liquid. Carefully measure ingredients, using the spoon-and-level method for flour to avoid packing. Ensure you’re using the correct type of flour specified in the recipe – bread flour is generally recommended.
Insufficient kneading can also lead to a dense loaf. The Cuisinart bread maker handles this automatically, but a malfunctioning kneading paddle could be the issue. Inspect the paddle for damage and ensure it’s securely attached.
Old yeast or incorrect liquid temperature (too cold) can also contribute to a dense texture. Verify yeast freshness and liquid warmth for optimal results.
Burning Smell During Baking
A burning smell typically indicates ingredients are stuck to the bottom of the bread pan, or the heating element. Immediately stop the machine using the START/STOP button held for three seconds. Carefully remove the bread pan – it will be hot!
Check for any unmixed flour or sugar clinging to the bottom. Ensure ingredients are added in the correct order, with liquids first. Excessive sugar or fat can also contribute to burning.
Avoid using ingredients with high sugar content in programs not designed for sweet breads. Thoroughly clean the bread pan after each use to prevent residue buildup.
Paddle Stuck in Bread
It’s common for the kneading paddle to remain lodged in the bread after baking. Allow the bread to cool in the pan for approximately 15-20 minutes before attempting removal. Gently use a non-metallic utensil, like a silicone spatula, to loosen the paddle.
Avoid using sharp objects that could damage the non-stick coating. If the paddle is firmly stuck, try adding a small amount of oil around its base. Ensure the paddle is securely attached before each baking cycle.
Regularly inspect the paddle for any damage or wear, replacing it if necessary for optimal performance.

Cleaning and Maintenance
Regular cleaning ensures longevity. Remove the bread pan and kneading paddle after each use. Wipe the machine housing with a damp cloth, avoiding immersion in water.
Cleaning the Bread Pan
After each baking cycle, promptly remove the bread pan from the Cuisinart Automatic Bread Maker. Allow it to cool completely before attempting to clean. Wash the bread pan with warm, soapy water, ensuring all bread residue is removed. A non-abrasive sponge or cloth is recommended to prevent scratching the non-stick coating.
Stubborn residue may require soaking in warm water for a period. Avoid using steel wool or harsh scouring pads, as these can damage the surface. Thoroughly rinse the bread pan and dry it completely before storing or reusing. The kneading paddle should also be washed in the same manner, ensuring it is securely attached when drying.
Some models may have a dishwasher-safe bread pan; consult your specific model’s manual for confirmation.
Cleaning the Machine Housing
To maintain the appearance and functionality of your Cuisinart Automatic Bread Maker, regularly clean the exterior housing. Always unplug the machine and allow it to cool completely before cleaning. Wipe down the housing with a damp, soft cloth. Avoid using abrasive cleaners or harsh chemicals, as these can damage the finish.
For stubborn stains or spills, a mild dish soap solution can be used, followed by a clean, damp cloth to remove any residue. Never immerse the machine base in water or any other liquid. Ensure no water enters the internal components.
Regular cleaning will help prevent buildup and maintain the longevity of your bread maker. Dry the housing thoroughly with a clean cloth before storing.
Storage Instructions
When not in use, ensure your Cuisinart Automatic Bread Maker is completely cool, clean, and dry before storing. Store the machine in a cool, dry place, away from direct sunlight and moisture. It’s best to keep it in its original packaging if available, or a similar protective container.
Avoid storing anything on top of the machine that could cause damage or obstruct ventilation. Keep the power cord neatly coiled and stored alongside the unit, preventing tripping hazards. Ensure the kneading paddle is stored safely, ideally with the bread pan.
Proper storage will help prolong the life of your bread maker and keep it ready for your next baking adventure.

Recipe Booklet Overview
Explore the included recipe booklet for a delightful array of bread-making possibilities, from classic white bread to flavorful whole wheat variations, and sweet treats!
Basic White Bread Recipe
Yields: 1 loaf (1.5 or 2 lb) | Prep time: 10 minutes | Cook time: Varies by program (approximately 3 hours 30 minutes)
Ingredients: 1 ¼ cups (300ml) warm water, 3 ½ cups (420g) bread flour, 2 tablespoons (30ml) sugar, 1 ½ teaspoons (7g) salt, 2 ¼ teaspoons (7g) active dry yeast, 3 tablespoons (45ml) softened butter.
Instructions: Add ingredients to the bread pan in the order listed. Select the “Basic” program and desired loaf size and crust color. Press start. Monitor briefly to ensure proper mixing. Once the cycle is complete, carefully remove the bread pan and let cool before slicing and enjoying your freshly baked loaf!
Tip: For best results, use fresh ingredients.
Whole Wheat Bread Recipe
Yields: 1 loaf (1.5 or 2 lb) | Prep time: 10 minutes | Cook time: Varies by program (approximately 3 hours 45 minutes)
Ingredients: 1 ¼ cups (300ml) warm water, 2 cups (280g) bread flour, 1 ½ cups (170g) whole wheat flour, 2 tablespoons (30ml) honey, 1 ½ teaspoons (7g) salt, 2 ¼ teaspoons (7g) active dry yeast, 2 tablespoons (30ml) vegetable oil.
Instructions: Add ingredients to the bread pan in the order listed. Select the “Whole Wheat” program and your preferred loaf size and crust color. Press start. Whole wheat dough requires a longer rise, so the cycle will be extended. Once finished, remove the pan and allow the loaf to cool completely before slicing.
Tip: Adding a tablespoon of vital wheat gluten can improve texture.
Advanced Features & Tips
Explore the delay timer for fresh bread whenever you want, and utilize the keep-warm function to maintain optimal temperature for hours!
Delay Timer Function
The delay timer allows you to conveniently schedule your bread to be freshly baked to coincide with meal times. Simply calculate the desired finish time and set the timer accordingly. Remember to account for the total baking cycle duration of your chosen program.
Press the “Delay Timer” button and use the hour and minute buttons to set the time you want your bread to be finished. Ensure all ingredients are at room temperature when using this function, especially yeast, to guarantee proper activation. Avoid using perishable ingredients like milk or eggs for extended delay times. Always double-check the settings before initiating the cycle to avoid unexpected results. This feature offers ultimate flexibility for busy schedules!
Keep Warm Function
The Keep Warm function is incredibly useful for maintaining your freshly baked bread at an optimal serving temperature. Once the baking cycle completes, the bread maker automatically switches to the Keep Warm mode, preventing it from cooling down too quickly.
This feature can keep your bread warm for up to one hour, providing flexibility if you’re not immediately ready to enjoy it. However, it’s important to note that prolonged warming may slightly dry out the crust. To deactivate the Keep Warm function, simply press the “Start/Stop” button. This ensures your bread remains delightfully warm and ready whenever you are!